OSC provides an isolated and custom R environment for each classroom project that requires Rstudio. The interface can be accessed at class.osc.edu. Before using this interface, please apply for a classroom project account that is unique for the course. More details on the classroom project can be found here. The custom R environment for the course will be tied to this project ID. Please inform us if you have additional requirements for the class. Once we get the information, we will provide you a course_ID (which is commonly the course ID provided by instructor + school code, e.g. MATH2530_OU)and add your course to the server with the class module created using the course_ID. After login to the class.osc.edu server, you will see several Apps listed. Pick Rstudio server and that will take you to the Rstudio Job submission page. Please pick your course from the drop-down menu under the Class materials and the number of hours needed.
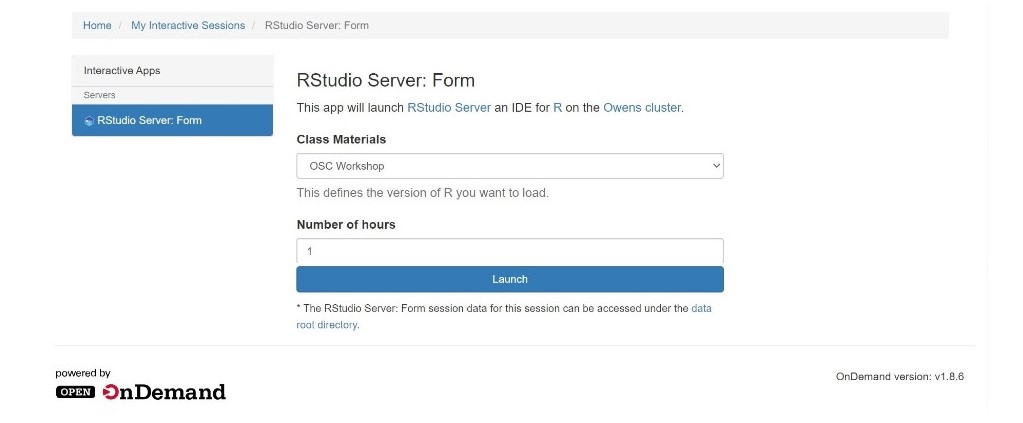
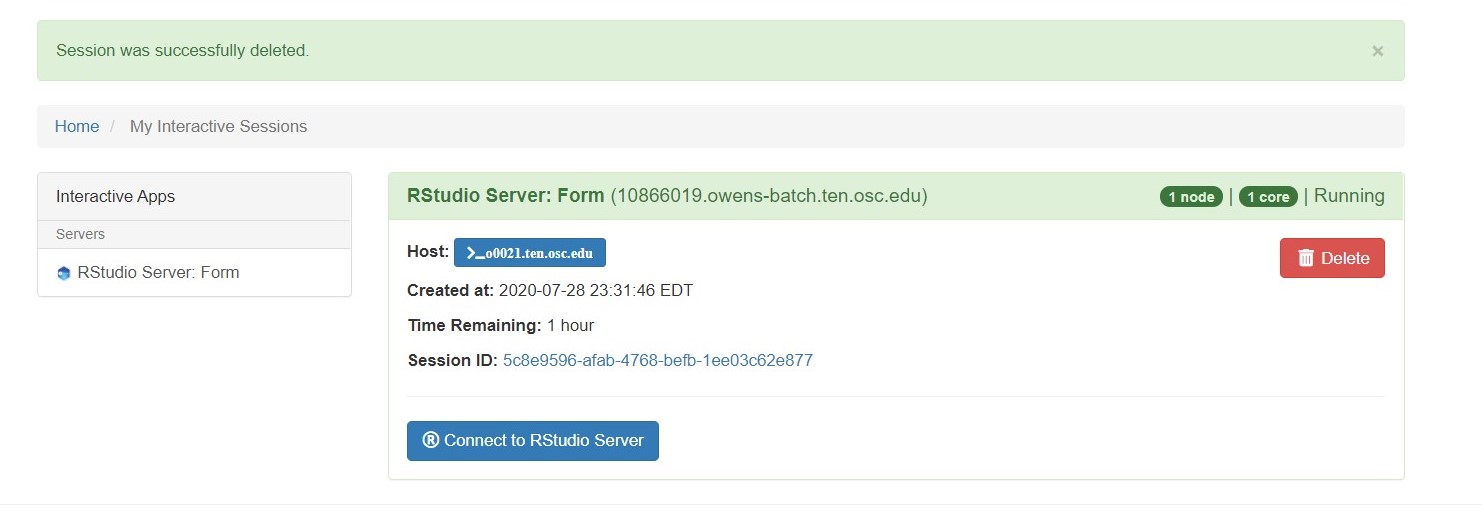
Clicking on the Launch will submit the Rstudio job to the scheduler and you will see Connect to Rstudio server option when the resource is ready for the job. Each Rstudio launch will run on 1 core on Cardinal machine with 4GB of memory.
Rstudio will open up in a new tab with a custom and isolated environment that is set through a container-based solution. This will create a folder under $HOME/osc_classes/course_ID for each user. Please note that inside the Rstudio, you won't be able to access any files other than class materials. However, you can access the class directory outside of Rstudio to upload or download files.
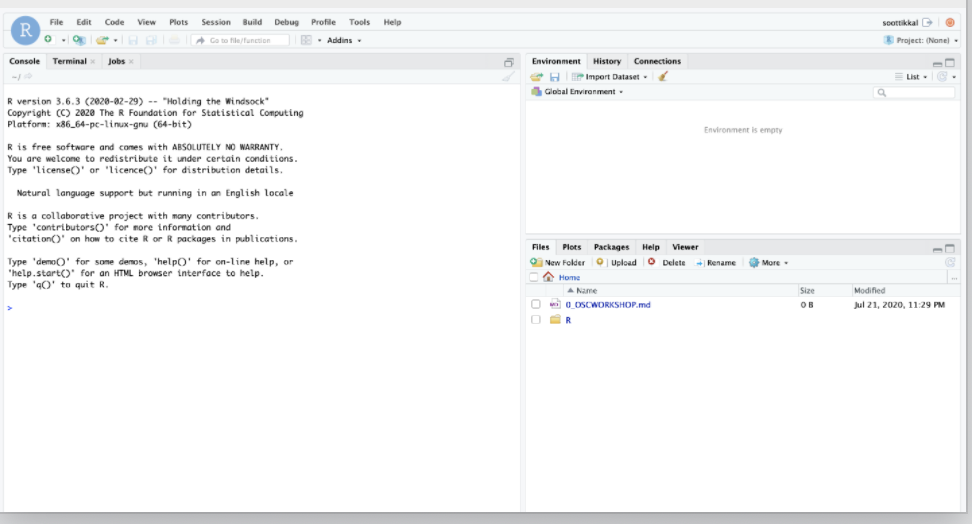
You can quit a Rstudio session by clicking on File from the top tabs then on the Quit. This will only quit the session, but the resource you requested is still held until walltime limit is reached. To release the resource, please click on DELETE in the Rstudio launch page.
Shared Access
PI can store and share materials like data, scripts, etc, and R packages with the class. We will set up a project space for the project ID of the course. This project space will be created under /fs/ess/project_ID. Once the project space is ready, please login to Cardinal or Pitzer as PI account of the classroom project. Run the following script with the project ID and course ID. This will create a folder with the course_ID under the project space and then two subfolders 1) Rpkgs 2) materials under it.
~support/classroom/tools/setup_rstudio_classroom /fs/ess/project_ID course_ID
Shared R packages
Once the class module is ready, PI can access the course at class.osc.edu under the Rstudio job submission page. PI can launch the course environment and install R packages for the class.
After launching Rstudio, please run the .libPaths() as follows
> .libPaths()
[1] "/users/PZS0711/akachlan/osc_classes/OSCWORKSHOP/R"
[2] "/fs/ess/PZS1117/OSCWORKSHOP/Rpkgs"
[3] "/apps/R/gnu/9.1/4.0.2/site/pkgs"
[4] "/apps/R/gnu/9.1/4.0.2/lib64/R/library"
Here you will see four R library paths. The last two are system R library paths and are accessible for all OSC users. OSC installs a number of popular R packages at the site location. You can check available packages with library() command. The first path is a personal R library of each user in the course environment and is not shared with students. The second lib path is accessible to all students of the course(Eg: /fs/ess/PZS0687/OSCWORKSHOP/Rpkgs). PI should install R packages in this library to share with the class. As a precaution, it is a good idea to eliminate PI's personal R library from .libPaths() before R package installation as follows. Please note that this step is needed to be done only when preparing course materials by PI.
> .libPaths(.libPaths()[-1])
> .libPaths()
[1] "/fs/ess/PZS1117/OSCWORKSHOP/Rpkgs"     "/apps/R/gnu/9.1/4.0.2/site/pkgs"
[3] "/apps/R/gnu/9.1/4.0.2/lib64/R/library"
Now there is only one writable R library path such that all packages will be installed into this library path and shared for all users.
PI can install all packages required for the class using install.packages() function. Once the installation is complete, students will have access to all those packages.
Please note that students can also install their own packages. Those packages will be installed into their personable library in the class environment i.e., the first path listed under .libPaths()
Shared materials
PI can share materials like data, scripts, and rmd files stored in /fs/ess/project_ID/course_ID/materials with students. When a student launch a Rstduio session, the directory will be copied to the student's workspace $HOME/osc_classes/courseID (destination). Please inform us if you want to use a source directory other than /fs/ess/project_ID/course_ID/materials. The student will see the directory materials on the landing page. PI can add files to the material source directory. New files will be copied to the destination every time using rsync when a new Rstudio session starts. But If PI modifies existing files, the changes won't be copied as the files were copied before. Therefore we recommend renaming the file after the update so that it will be copied.
Please limit the size of data stored in the material folders of your project space to a maximum of 3GB. Larger files can cause issues with the rsync process. If you have files that exceed this limit, we recommend hosting them outside the material folder within your project space. Students will still be able to access the data after launching RStudio. If you need assistance managing large files or have any other questions, please don't hesitate to reach out for support
There are several different ways to copy materials manually from a directory to students' workspace.
- On
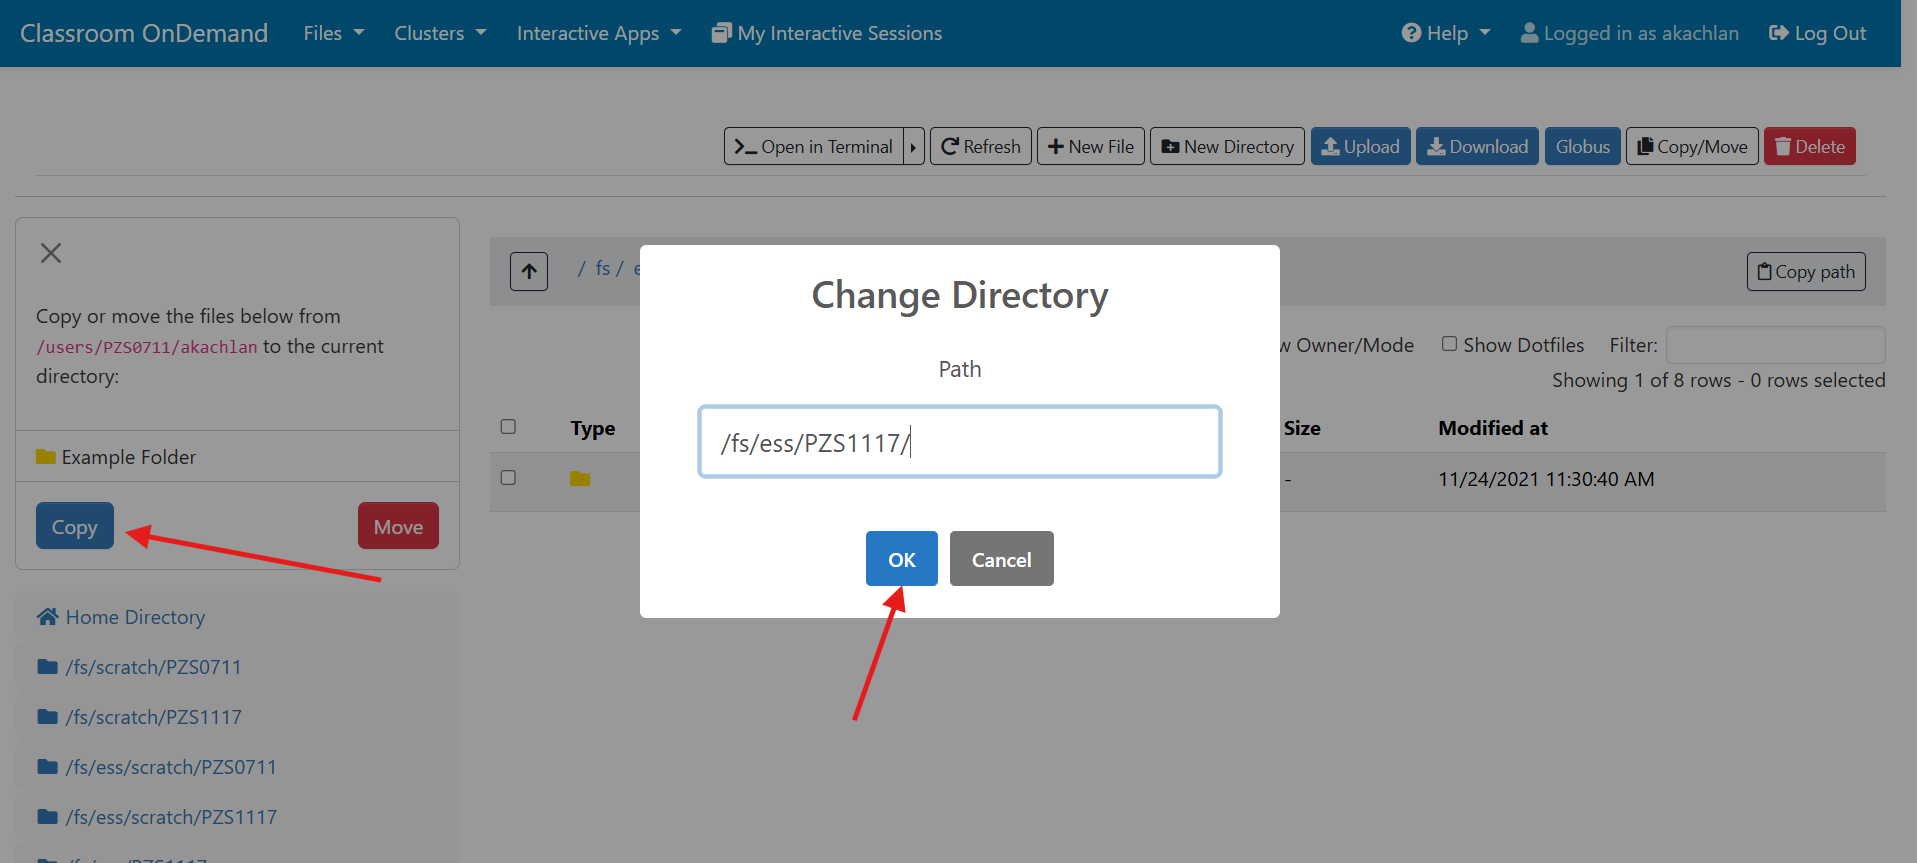
class.osc.eduserver, click onFilesfrom the top tabs, then on$HOMEdirectory. From the top right, click onGo toand enter the storage path (Eg:/fs/ess/PZS1117/) in the box and press OK. This will open up storage path and users can copy files. Open the class folder from the$HOMEtree shown on left and paste files there. All files copied to$HOME/osc_classes/course_IDwill appear in the Rstudio FIle browser.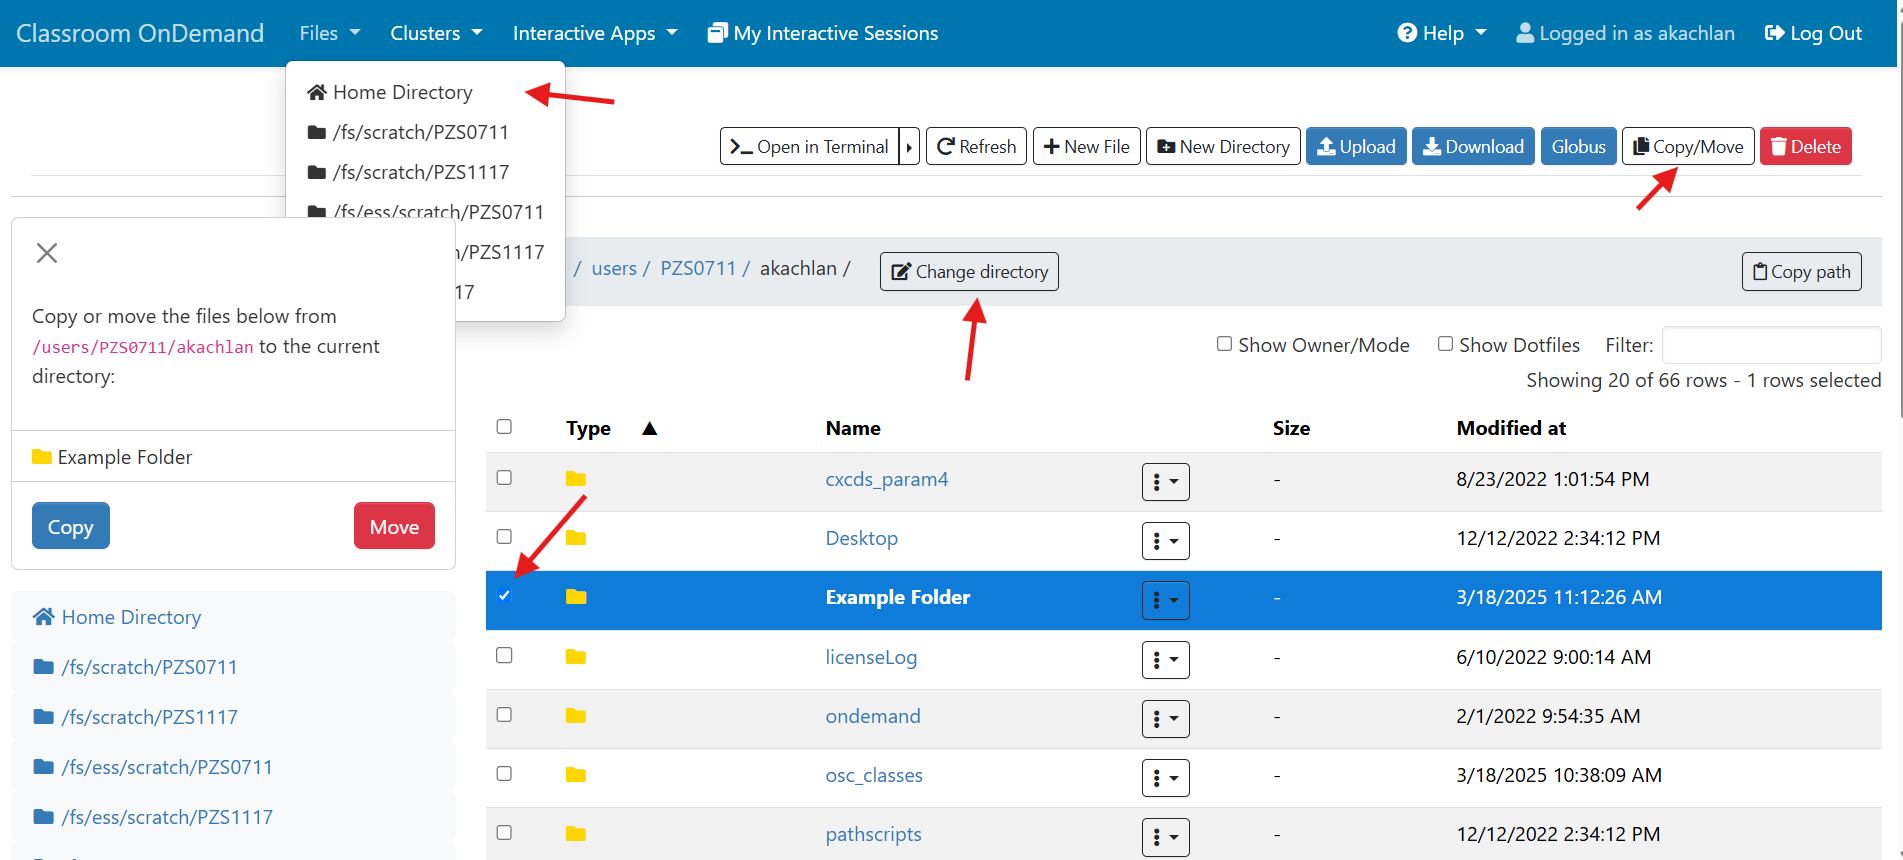
- On
class.osc.eduserver, Click onClustersfrom the top tabs, then onCardinal Shell Access. This will open up a terminal on Cardinal where students can enter Unix command for copying. Eg:cp -r /fs/ess/PZS1117/OSCWORKSHOP/materials $HOME/osc_classes/course_ID
Please note that$HOME/osc_classes/course_IDwill be created only after launching Rstudio instance at least once. - Students can also upload material directly to Rstudio using the
uploadtab located in theFile browserof Rstudio from their local computer. This assumes they have already downloaded materials to their computers.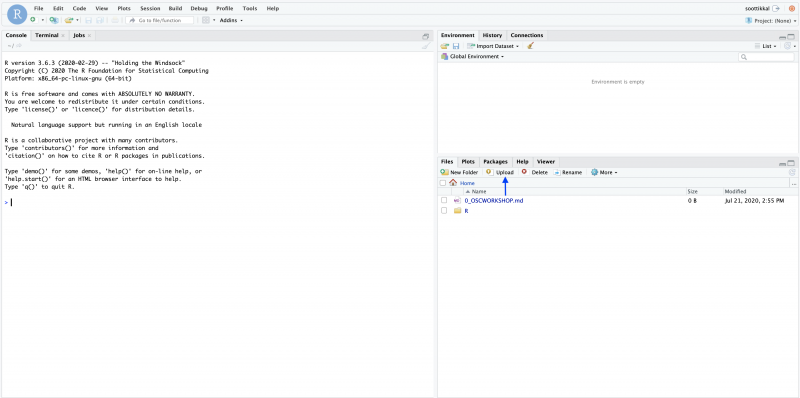
Checklist for PIs
- Apply for a classroom project ID that is unique to the course
- Add yourself, PI, to the project as an authorized user.
- Inform us about additional requirements such as R version or other software
- Once the class module is ready, create class materials under the storage path, and install R packages in the class environment.
- Make a reservation on OSC cluster for the class schedule.
- Invite students to the project at my.osc.edu to give them access to the project ID.
Please reach out to oschelp@osc.edu if you have any questions.