Desmond is a software package that perform high-speed molecular dynamics simulations of biological systems on conventional commodity clusters, general-purpose supercomputers, and GPUs. The code uses novel parallel algorithms and numerical techniques to achieve high performance and accuracy on platforms containing a large number of processors, but may also be executed on a single computer. Desmond includes code optimized for machines with an NVIDIA GPU.
Availability and Restrictions
Versions
The Desmond package is available on Ascend and Cardinal. The versions currently available at OSC are:
| Version | Pitzer | Ascend | Cardinal | Note |
|---|---|---|---|---|
| 2023.4 | X | X* | GPU support only | |
| 2024.4 | X | X | X | GPU support only |
You can use module spider desmond to view available modules for a given machine. Feel free to contact OSC Help if you need other versions for your work. Starting from the Desmond_Maestro_2019.1 release, desmond only supports GPUs.
Access for Academic Users
Desmond is available to academic OSC users. Please review the license agreement carefully before use. If you have any questions, please contact OSC Help.
Publisher/Vendor/Repository and License Type
D. E. Shaw Research, Non-Commercial
Usage
Usage on Ascend, Cardinal, and Pitzer
Set-up
To set up your environment for desmond load one of its module files:
module load desmond/2024.4
If you already have input and configuration files ready, here is an example batch script that uses Desmond non-interactively via the batch system:
#!/bin/bash #SBATCH --job-name multisim-batch #SBATCH --time=0:20:00 #SBATCH --nodes=1 #SBATCH --ntasks-per-node=24 #SBATCH --account=<account># Example Desmond single-node batch script. sstat -j $SLURM_JOB_ID module reset module load desmond/2024.4 module list sbcast -p desmondbutane.msj $TMPDIR/desmondbutane.msj sbcast -p desmondbutane.cfg $TMPDIR/desmondbutane.cfg sbcast -p desmondbutane.cms $TMPDIR/desmondbutane.cms cd $TMPDIR $SCHRODINGER/utilities/multisim -HOST localhost -maxjob 1 -cpu 24 -m desmondbutane.msj -c desmondbutane.cfg desmondbutane.cms -mode umbrella -ATTACHED -WAIT ls -l cd $SLURM_SUBMIT_DIR sgather -r $TMPDIR $SLURM_SUBMIT_DIR
The WAIT option forces the multisim command to wait until all tasks of the command are completed. This is necessary for batch jobs to run effectively. The HOST option specifies how tasks are distributed over processors.
Set-up via Maestro
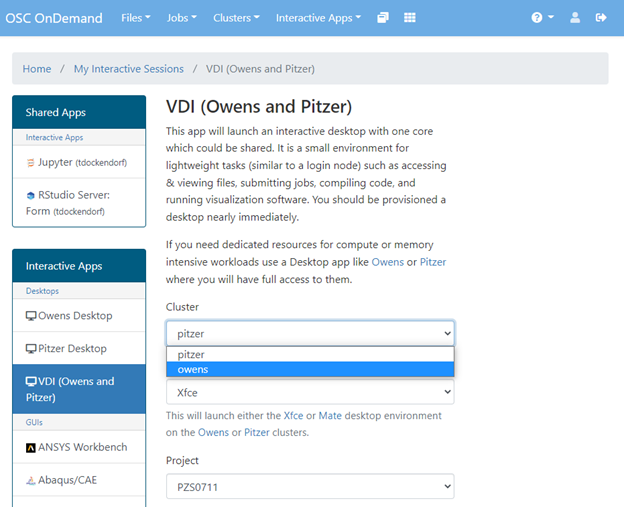
Desmond comes with its own Schrodinger interactive builder, Maestro. (Note that users should use matching versions of Desmond and Maestro, which is the case when following the details below; we have had reports of problems when mixing versions.) To run maestro, connect to OSC OnDemand and luanch a desktop, either via Desktops in the Interactive Apps drop down menu (these were labelled Virtual Desktop Interface (VDI) previously) or via Shell Access in the Clusters drop down menu (these were labelled Interactive HPC Desktop previously). Click "Setup process" below for more detailed instructions. Note that one cannot launch desmond jobs in maestro via the Schrodinger GUI in the Interactive Apps drop down menu.
Setup process
Log in to OSC OnDemand and request a Desktop/VDI session (this first screen shot below does not reflect the current, 2025, labelling in OnDemand).
In a Desktop/VDI environment, open a terminal and run (this is a critical step; one cannot launch desmond jobs in maestro via the Schrodinger GUI in the Interactive Apps drop down menu.
module load desmond
maestro
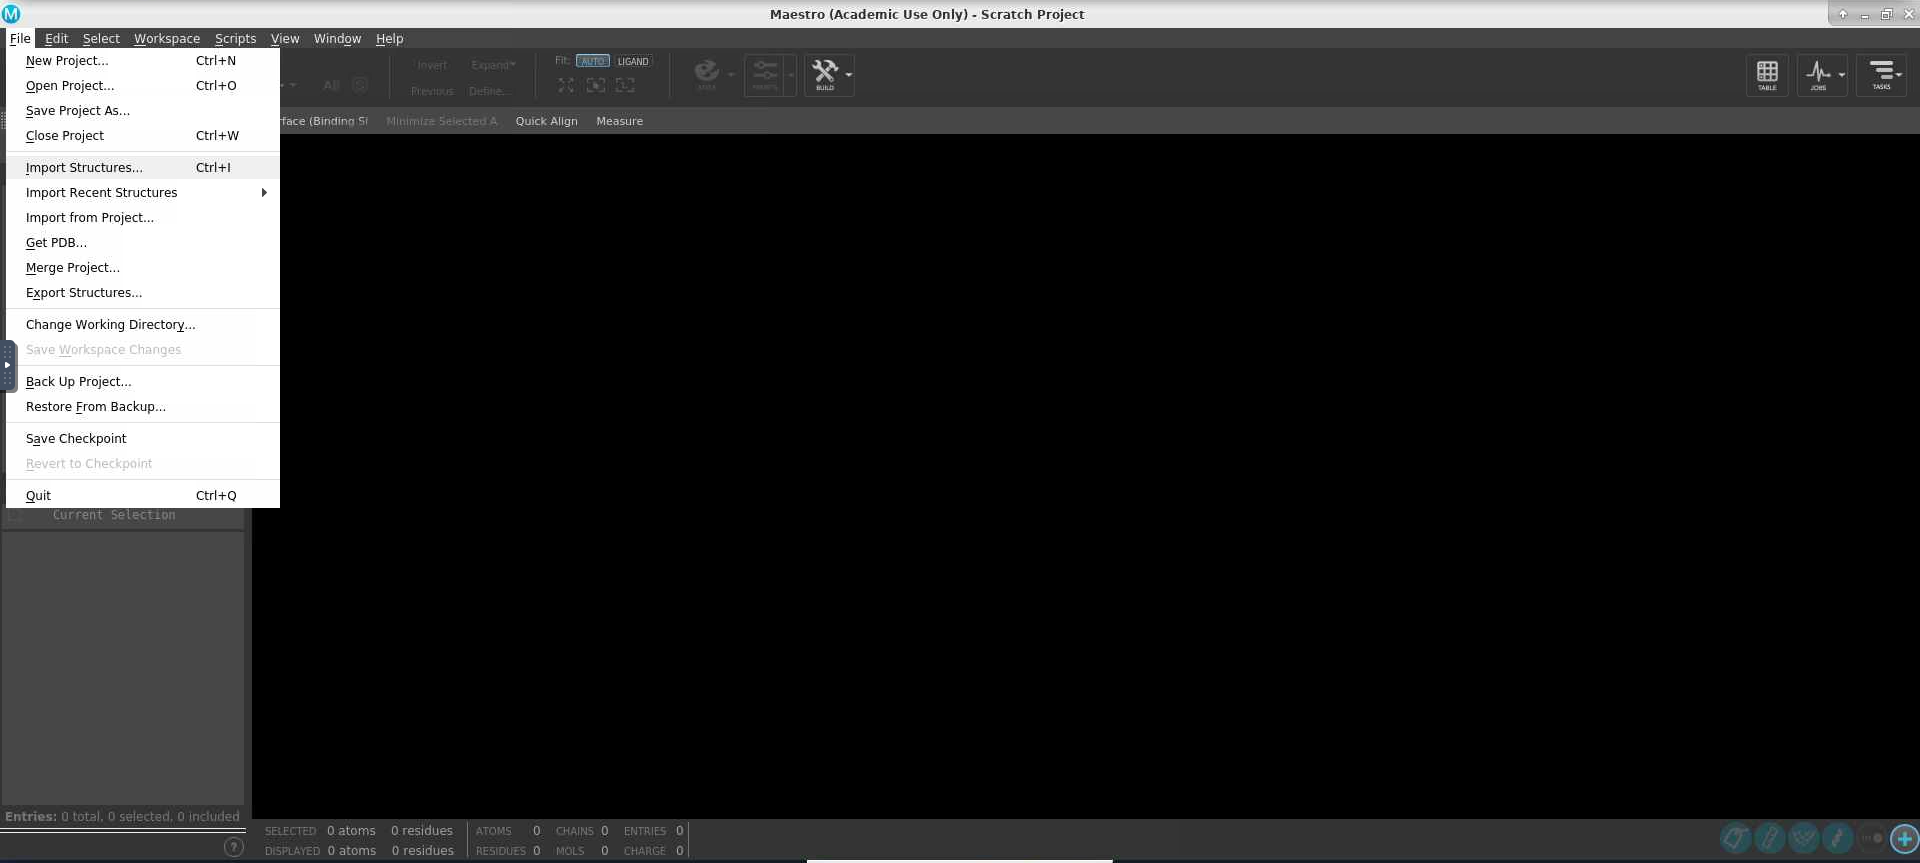
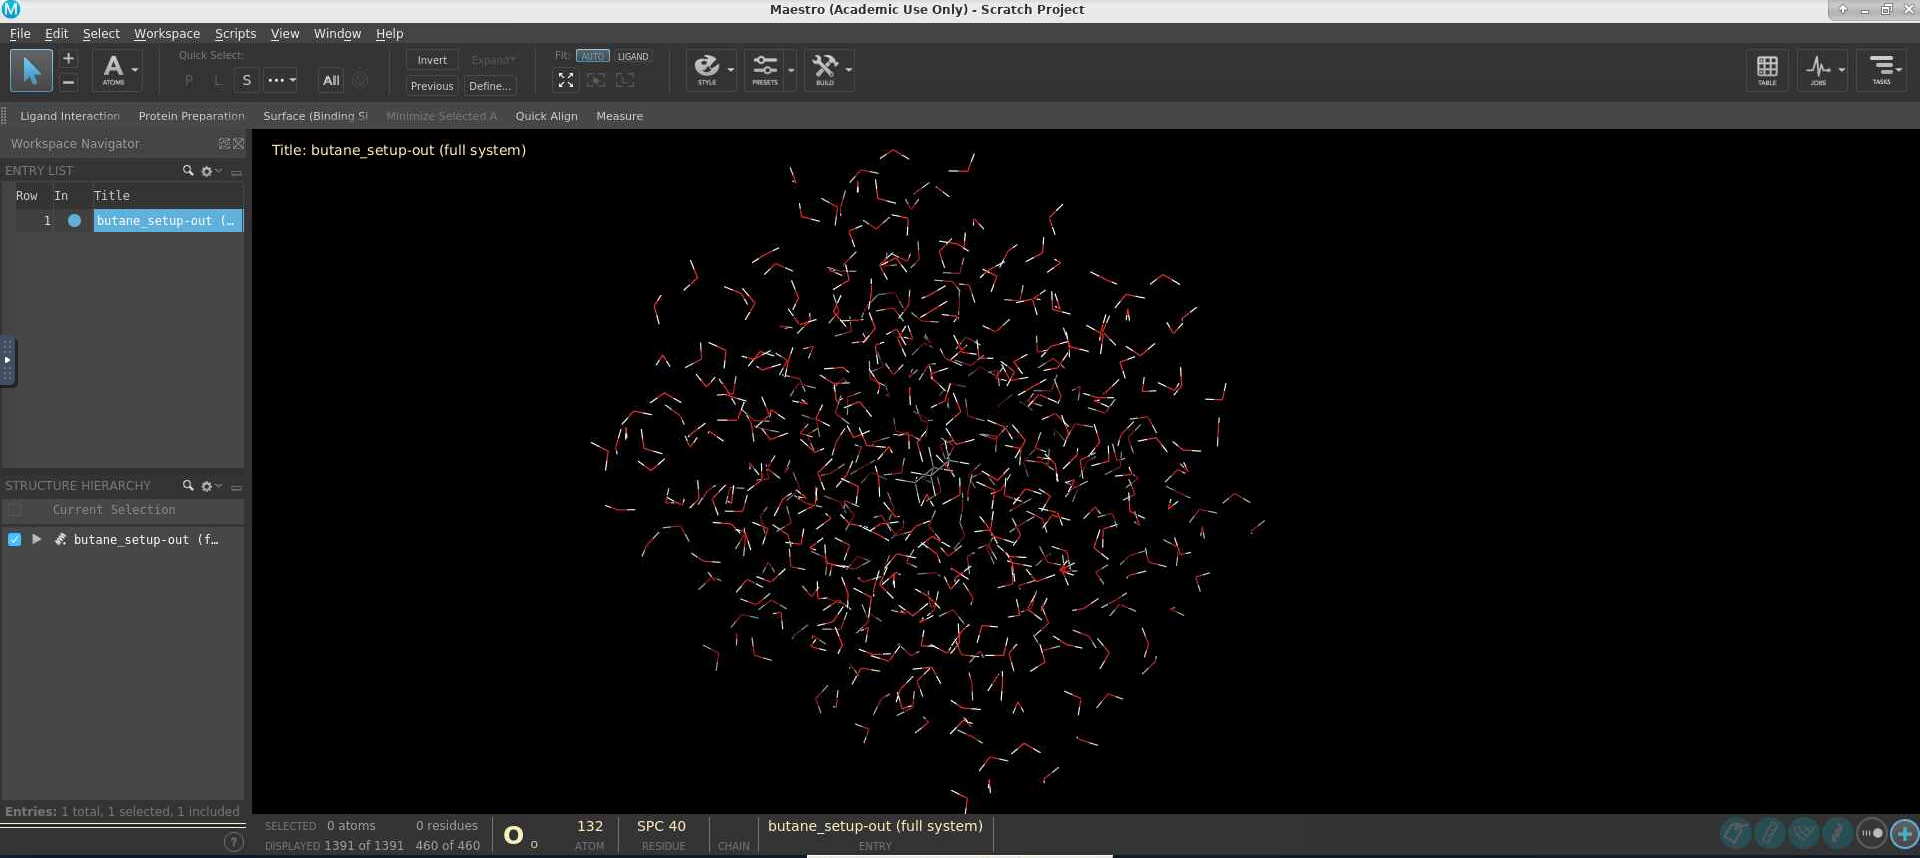
In the main window of Maestro, you can open File and import structures or create new project
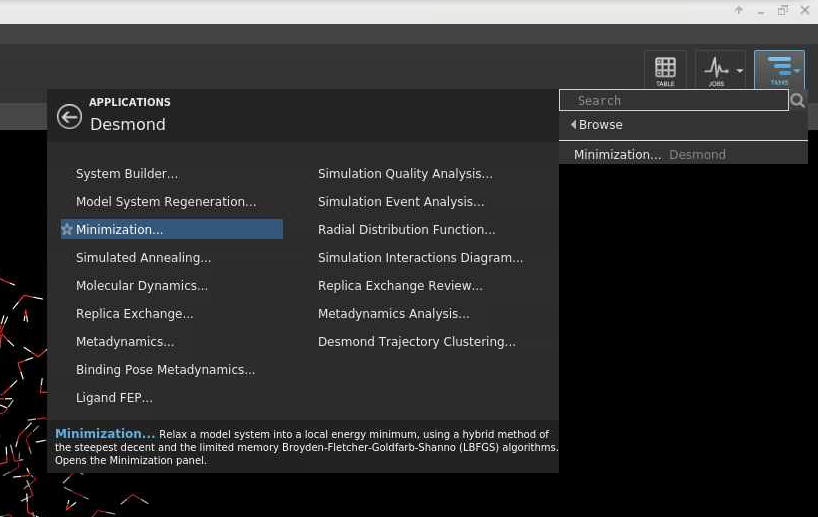
Once the structure is ready, navigate to the top right Tasks icon and find Desmond application; the details of this step depend on the software version; if you do not find desmond listed then use the search bar.
Tasks >> Browse... > Applications tab >> Desmond
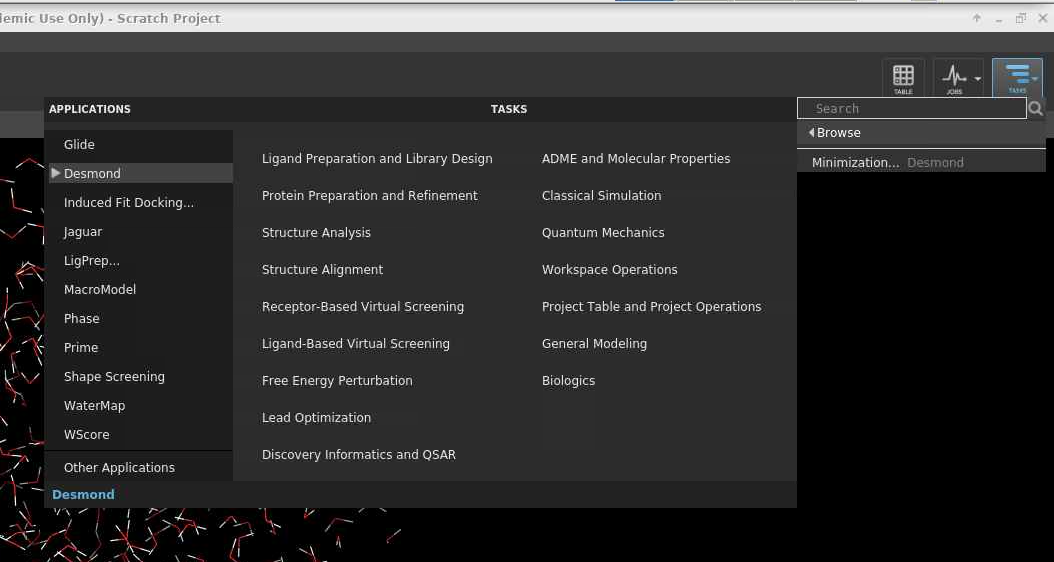
In this example a Minimazation job will be done.
Make sure the Model system is ready:
Model system >> Load from workspace >> Load
You can change the Job name; and you can write out the script and configuration files by clicking Write as shown below:
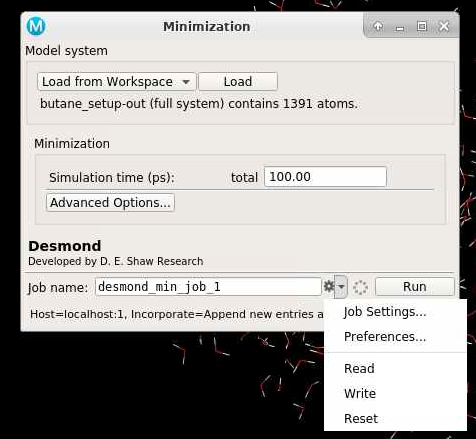
The green text will indicate the job path with the prefix "Job written to...". The path is a new folder located in the working directory indicated earlier.

Navigate using the terminal to that directory. You can modify the script to either run the simulation with a GPU or a CPU.
Run simulation with GPU
Navigate using the terminal to that directory and add the required SLURM directives and module commands at the top of the script, e.g.: desmond_min_job_1.sh:
#!/bin/bash
#SBATCH --time=0:20:00
#SBATCH --nodes=1
#SBATCH --ntasks-per-node=8
#SBATCH --gpus-per-node=1
#SBATCH --account=<account>

module reset
module load desmond/2023.2

# Desmond job script starts here
The setup is complete.
Run simulation with CPU only; this is no longer available, but is kept for posterity
Navigate using the terminal to that directory and edit the script, e.g.: desmond_min_job_1.sh:
"${SCHRODINGER}/utilities/multisim" -JOBNAME desmond_min_job_1 -HOST localhost -maxjob 1 -cpu 1 -m desmond_min_job_1.msj -c desmond_min_job_1.cfg -description Minimization desmond_min_job_1.cms -mode umbrella -set stage[1].set_family.md.jlaunch_opt=["-gpu"] -o desmond_min_job_1-out.cms -ATTACHED
Delete the -set stage[1].set_family.md.jlaunch_opt=["-gpu"] argument and change the -cpu argument from 1 to the number of CPUs you want, e.g. 8, resulting in
"${SCHRODINGER}/utilities/multisim" -JOBNAME desmond_min_job_1 -HOST localhost -maxjob 1 -cpu 8 -m desmond_min_job_1.msj -c desmond_min_job_1.cfg -description Minimization desmond_min_job_1.cms -mode umbrella -o desmond_min_job_1-out.cms -ATTACHED
Add the required SLURM directives and module commands at the top of the script:
#!/bin/bash
#SBATCH --time=0:20:00
#SBATCH --nodes=1
#SBATCH --ntasks-per-node=24
#SBATCH --account=<account>

module reset
module load desmond/2019.1

# Desmond job script starts here
The setup is complete.