If you plan on using GPUs in tensorflow or pytorch see HOWTO: Use GPU with Tensorflow and PyTorch
This is an exmaple to utilize a GPU to improve performace in our python computations. We will make use of the Numba python library. Numba provides numerious tools to improve perfromace of your python code including GPU support.
This tutorial is only a high level overview of the basics of running python on a gpu. For more detailed documentation and instructions refer to the official numba document: https://numba.pydata.org/numba-doc/latest/cuda/index.html
Environment Setup
To begin, you need to first create and new conda environment or use an already existing one. See HOWTO: Create Python Environment for more details.
Once you have an environment created and activated run the following command to install the latest version of Numba into the environment.
conda install numba
conda install cudatoolkit
You can specify a specific version by replacing numba with number={version}. In this turtorial we will be using numba version 0.60.0 and cudatoolkit version 12.3.52.
Write Code
Now we can use numba to write a kernel function. (a kernel function is a GPU function that is called from CPU code).
To invoke a kernel, you need to include the @cuda.jit decorator above your gpu function as such:
@cuda.jit
def my_funtion(array):
     # function code
Next to invoke a kernel you must first specify the thread heirachy with the number of blocks per grid and threads per block you want on your gpu:
threadsperblock = 32
blockspergrid = (an_array.size + (threadsperblock - 1))
For more details on thread heirachy see: https://numba.pydata.org/numba-doc/latest/cuda/kernels.html
Now you can call you kernel as such:
my_function[blockspergrid, threadsperblock](an_array)
Kernel instantiation is done by taking the compiled kernel function (here my_function) and indexing it with a tuple of integers.
Run the kernel, by passing it the input array (and any separate output arrays if necessary). By default, running a kernel is synchronous: the function returns when the kernel has finished executing and the data is synchronized back.
Note: Kernels cannot explicitly return a value, as a result, all returned results should be written to a reference. For example, you can write your output data to an array which was passed in as an argument (for scalars you can use a one-element array)
Memory Transfer
Before we can use a kernel on an array of data we need to transfer the data from host memory to gpu memory.
This can be done by (assume arr is already created and filled with the data):
d_arr = cuda.to_device(arr)
d_arr is a reference to the data stored in the gpu memory.
Now to get the gpu data back into host memory we can run (assume gpu_arr has already been initialized ot an empty array):
d_arr.copy_to_host(gpu_arr)
Example Code:
from numba import cuda
import numpy as np
from timeit import default_timer as timer

# gpu kernel function
@cuda.jit
def increment_by_one_gpu(an_array):
    #get the absolute position of the current thread in out 1 dimentional grid
    pos = cuda.grid(1)

    #increment the entry in the array based on its thread position
    if pos < an_array.size:
        an_array[pos] += 1


# cpu function
def increment_by_one_nogpu(an_array):
    # increment each position using standard iterative approach
    pos = 0
    while pos < an_array.size:
        an_array[pos] += 1
        pos += 1

if __name__ == "__main__":

    # create numpy array of 10 million 1s
    n = 10_000_000
    arr = np.ones(n)

    # copy the array to gpu memory
    d_arr = cuda.to_device(arr)

    # print inital array values
    print("GPU Array: ", arr)
    print("NON-GPU Array: ", arr)

    #specify threads
    threadsperblock = 32
    blockspergrid = (len(arr) + (threadsperblock - 1)) // threadsperblock

    # start timer
    start = timer()
    # run gpu kernel
    increment_by_one_gpu[blockspergrid, threadsperblock](d_arr)
    # get time elapsed for gpu
    dt = timer() - start

    print("Time With GPU: ", dt)

    # restart timer
    start = timer()
    # run cpu function
    increment_by_one_nogpu(arr)
    # get time elapsed for cpu
    dt = timer() - start

    print("Time Without GPU: ", dt)

    # create empty array
    gpu_arr = np.empty(shape=d_arr.shape, dtype=d_arr.dtype)

    # move data back to host memory
    d_arr.copy_to_host(gpu_arr)

    print("GPU Array: ", gpu_arr)
    print("NON-GPU Array: ", arr)
Now we need to write a job script to submit the python code.
#!/bin/bash

#SBATCH --account <project-id>
#SBATCH --job-name Python_ExampleJob
#SBATCH --nodes=1
#SBATCH --time=00:10:00
#SBATCH --gpus-per-node=1


module load miniconda3/24.1.2-py310
module list

source activate gpu_env

python gpu_test.py

conda deactivate
Running the above job returns the following output:
GPU Array:  [1. 1. 1. ... 1. 1. 1.]
NON-GPU Array:  [1. 1. 1. ... 1. 1. 1.]
Time With GPU:  0.34201269410550594
Time Without GPU:  2.2052815910428762
GPU Array:  [2. 2. 2. ... 2. 2. 2.]
NON-GPU Array:  [2. 2. 2. ... 2. 2. 2.]
As we can see, running the function on a gpu resulted in a signifcant speed increase.
Usage on Jupyter
see HOWTO: Use a Conda/Virtual Environment With Jupyter for more information on how to setup jupyter kernels.
One you have your jupyter kernel created, activate your python environment in the command line (source activate ENV).
Install numba and cudatoolkit the same as was done above:
conda install numba
conda install cudatoolkit
Now you should have numba installed into your jupyter kernel.
See Python page for more information on how to access your jupyter notebook on OnDemand.
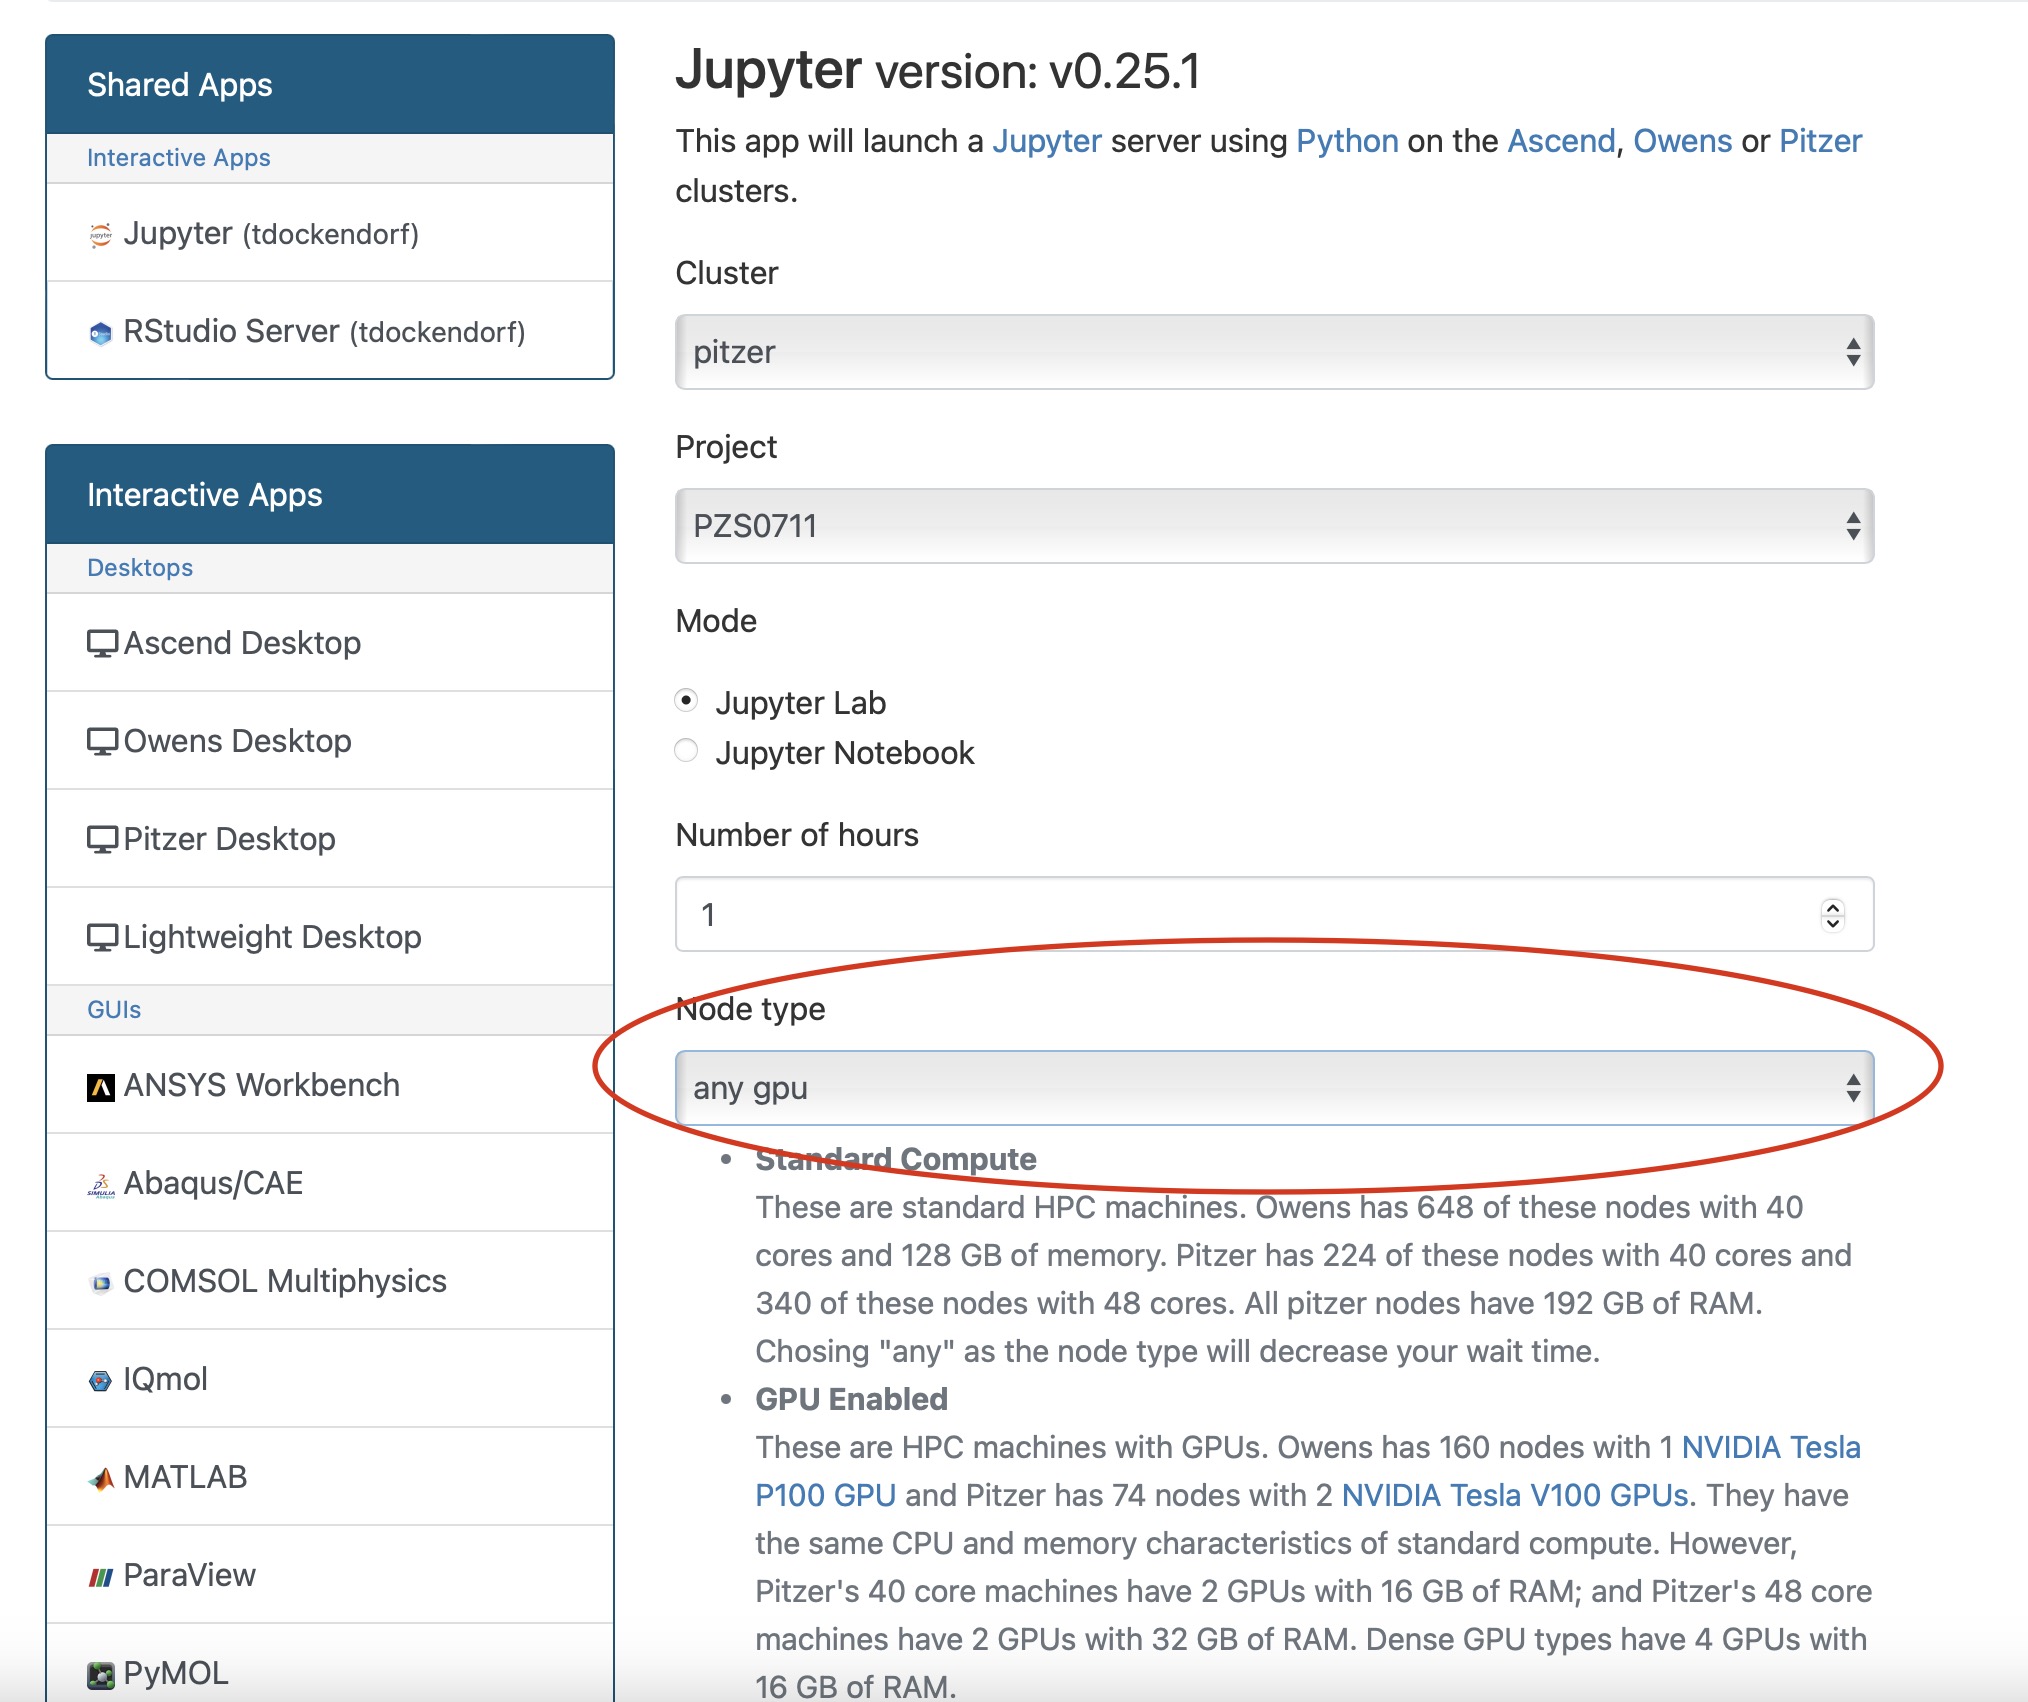
Make sure you select a node with a gpu before laucnhing your jupyter app:

Additional Resources
If you are using Tensorflow, PyTorch or other machine learning frameworks you may want to also consider using Horovod. Horovod will take single-GPU training scripts and scale it to train across many GPUs in parallel.